Introduction
Running a flow wrapper at peak performance requires consistent daily attention. Whether you’re packaging food products, pharmaceuticals, or consumer goods, the difference between a machine that runs flawlessly for years and one that constantly breaks down often comes down to what happens in the first 15 minutes of each shift.
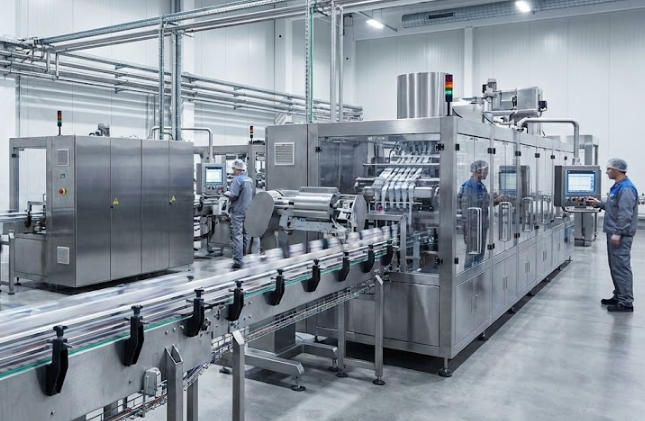
This comprehensive operator’s guide provides you with a complete daily maintenance checklist that covers every critical component of your horizontal flow wrapping machine. Following these procedures consistently will reduce unplanned downtime by up to 60%, extend machine lifespan, and ensure consistent package quality. You’ll learn exactly what to inspect, how to inspect it, and what to do when you find problems.
The procedures outlined here apply to standard horizontal flow wrappers used across the packaging industry. While specific tolerances and intervals may vary by manufacturer, the fundamental principles remain consistent across all brands including Paxiom, Ilapak, Path Pack and Wolf-Packing systems.
What Is Your Flow Wrapper’s Daily Needs and Why Does It Matter?
Why Daily Maintenance Matters
A flow wrapper operates under significant stress. The machine performs thousands of sealing cycles per shift, with each cycle involving heat application, mechanical tension, and precise timing. Without daily attention, small issues compound into major failures. A loose belt that seems harmless on Monday can cause a complete drive system failure by Friday, resulting in thousands of dollars in lost production and emergency repairs.
Research from the International Society of Automation indicates that 70% of equipment failures in packaging machinery can be traced back to inadequate daily maintenance practices. The remaining 30% often involve design limitations or operator errors that proper training can prevent.
The Cost of Neglect
Consider this real-world scenario: A mid-sized bakery operating two flow wrappers for bread packaging neglected daily belt tension checks for three weeks. When a belt finally snapped during peak production, the result was a four-hour downtime, $2,400 in emergency repair costs, and 800 packages of bread that required repackaging. The daily check would have taken five minutes. The actual cost of neglect was 480 times higher than the prevention effort.
This pattern repeats across industries. Pharmaceutical packaging lines that skip daily sanitization checks risk contamination that can shut down entire production runs. Cosmetic manufacturers that ignore film path alignment face misaligned packages that fail quality inspection, leading to costly rework.
What Should Be on Your Pre-Shift Inspection Checklist?
Visual Inspection Phase (5-10 minutes)
Before starting your flow wrapper, perform a thorough visual inspection of the entire machine:
Machine Exterior: Check for any visible damage, loose panels, or unusual wear patterns on the machine housing. Look for oil leaks, coolant drips, or accumulation of product debris. The presence of foreign material around the sealing station often indicates early sealing problems.
Safety Equipment: Verify that all safety guards are properly installed and functional. Test emergency stop buttons to confirm they respond immediately. Check that all safety interlocks are engaged—this is non-negotiable and legally required in most jurisdictions.
Electrical Connections: Inspect the control cabinet for any signs of overheating, including discoloration around terminal blocks or a burning smell. Examine cable connections for tightness. Loose electrical connections cause approximately 15% of all flow wrapper control failures.
Material Verification (3-5 minutes)
Film Stock: Inspect the film roll for any damage, contamination, or edge tears. Verify that the film specifications match the current product requirements. Check film tension and alignment on the unwind stand. A misaligned film web will cause tracking problems throughout the entire roll.
Packaging Materials: Ensure adequate supply of any secondary materials—labels, batch codes, desiccants, or insertion items. Running out of these materials mid-shift causes unnecessary stoppages.
Product Contact Surfaces: Inspect the forming collar, sealing jaws, and product lane guides for product residue, contamination, or damage. In food and pharmaceutical applications, this inspection is critical for compliance.
How Do You Handle Operational Startup Procedures?
Power-Up Sequence
Follow this standardized startup sequence every morning:
- Main Power: Turn on the main disconnect and verify that the control system initializes properly. Modern PLC-controlled wrappers like those using Siemens or Schneider components should display a clean startup screen without error codes.
- Heating Elements: Allow adequate warm-up time for sealing jaws—typically 15-20 minutes depending on ambient temperature. Rushing this step leads to poor seal quality until the system stabilizes.
- Film Threading: Thread the film web carefully according to manufacturer specifications. Pay special attention to dancer bar positioning and web tension indicators. Improper threading is the leading cause of film breaks during production.
- Test Run: Run several empty packages before beginning production. This allows you to verify seal quality, film tracking, and overall machine behavior before committing product.
Baseline Parameter Verification
Document these parameters during startup:
Related: Cleaning and Sanitation Procedures for Packaging
| Parameter | Typical Range | Action if Out of Range |
|---|---|---|
| Sealing Temperature | 120-180°C | Check heating elements and thermocouples |
| Film Tension | Manufacturer Spec | Adjust dancer bar position |
| Seal Pressure | 2-4 bar | Check air supply and regulators |
| Cycle Speed | Per Product Spec | Verify PLC settings |
How Do You Monitor During-Production?
Hourly Checks (2-3 minutes each)
Seal Quality: Inspect the first package of each production run and then every hour thereafter. Look for consistent seal width (typically 8-12mm), absence of wrinkles that extend into the seal area, and proper cut-off positioning. Document any variations.
Related: Lubrication Points and Schedules: Keeping Your
Film Tracking: Watch for any lateral movement of the film web as it passes through the machine. Slight drift is normal, but progressive tracking toward one side indicates problems with idler rollers or film tension.
Noise Levels: Listen for unusual sounds—grinding, squealing, or irregular clicking. New noise patterns often precede mechanical failures by hours or days.
Related: Electrical System Maintenance: Preventing and Solving
Product Flow: Verify that products enter the wrapping zone consistently. Variations in product spacing lead to package length variations and potential jams.
Addressing Common Issues Immediately
Film Wrinkles: If you notice wrinkles forming in the seal area, stop immediately and check film tension, roller alignment, and forming box dimensions. Continuing production with wrinkles results in rejected packages.
Inconsistent Seals: Temperature variations of even 5°C can cause seal failures. If seals appear weak or inconsistent, verify temperature settings and check for product residue on sealing jaws.
Unusual Vibration: Vibration indicates misalignment, worn bearings, or loose components. Identifying the source quickly prevents cascading damage.
How Should You Maintain End-of-Shift?
Cleaning Procedures
Proper end-of-shift cleaning prevents contamination and prepares the machine for the next production run:
Product Contact Areas: Remove all product residue from forming collars, flight bars, and sealing surfaces. Use approved cleaning agents appropriate for your industry—food-grade cleaners for food packaging, pharmaceutical-grade disinfectants for medical products.
Film Path: Clear the film path of any debris or product fragments. Pay attention to areas where product typically accumulates, such as the forming tube and product feed lane.
Control Panel: Wipe down the operator interface with appropriate cleaners. The touch screen and keyboard area collects product dust and oils that can degrade controls over time.
Documentation Requirements
Maintain a daily maintenance log that records:
- Shift start and end times
- Any abnormalities observed during production
- Packages produced versus targets
- Seal quality samples retained
- Any corrective actions taken
- Operator signature or ID
This documentation serves multiple purposes: it creates accountability, enables trend analysis, and provides valuable information for future troubleshooting.
How Do You Handle Deep-Dive Checks?
Component-Specific Inspection
Beyond daily routines, allocate time weekly for deeper component inspection:
Drive System: Check belt tension and condition. A belt that deflects more than 15mm under finger pressure needs tensioning. Inspect for cracks, fraying, or glazing that indicates slipping.
Pneumatic System: Verify air pressure at the main regulator matches specifications. Check all pneumatic connections for leaks using soapy water or a leak detector. Inspect cylinder movement for smooth operation without stuttering.
Electrical Components: Tighten any terminals that show signs of heating or corrosion. Check indicator lights and sensors for proper function. Verify that all grounding connections are secure.
Mechanical Alignment: With the machine stopped, physically check the alignment of key components. Misalignment that develops gradually often goes unnoticed until it causes failures.
How Do You Build a Maintenance Culture?
Operator Training Essentials
Every operator should understand not just what to do, but why each step matters. When operators grasp the consequences of skipped maintenance, they become partners in equipment care rather than checkbox completers.
Essential training topics include:
- Basic mechanical principles of the flow wrapper
- Understanding of how each maintenance task prevents specific failures
- Recognition of early warning signs that indicate problems developing
- Proper documentation practices and their importance
- Safety procedures for working around operating equipment
Creating Accountability
Effective maintenance programs include accountability mechanisms:
- Supervisor spot-checks of operator maintenance logs
- Weekly review of downtime and quality data to identify trends
- Recognition programs for operators whose equipment consistently runs well
- Clear consequences for skipping required maintenance steps
FAQ
How long should daily maintenance take?
A thorough daily maintenance routine should take 15-25 minutes total—5-10 minutes for pre-shift inspection, 5-10 minutes for startup and testing, and 2-5 minutes for end-of-shift cleaning and documentation. This investment prevents hours of downtime.
What are the most common daily maintenance mistakes?
The three most frequent errors are: skipping the pre-shift inspection when running late, failing to document abnormalities (leading to repeated problems), and using improper cleaning agents that damage equipment or create contamination risks.
How do I know if my maintenance checklist is complete?
Your checklist should cover every point where wear, contamination, or misalignment can occur. If you’ve experienced the same failure twice, that component should have a dedicated daily check. Industry standards from PMMI provide baseline recommendations that you can customize.
Should daily maintenance vary by production volume?
The tasks remain the same, but higher-volume production demands more frequent in-process checks—perhaps every 30 minutes instead of every hour. The pre and post-shift routines should be consistent regardless of volume.
What should I do if I find a serious problem during daily maintenance?
Stop the machine if the issue affects safety or could cause immediate damage. Document the problem thoroughly with photos if possible. Report to maintenance immediately with specific details. Never operate equipment with known safety issues.
Conclusion
Daily maintenance is the foundation of reliable flow wrapper operation. The procedures in this guide require only 20 minutes per day but prevent the vast majority of equipment failures that plague packaging operations. Consistency matters more than thoroughness on any single day—what counts is building reliable habits that operators follow every single shift, every single day.
Start implementing this checklist today. Begin with the pre-shift inspection and add elements gradually until full compliance becomes second nature. Track your downtime metrics—you’ll likely see significant improvement within the first month.
For assistance selecting a flow wrapper built for reliability and ease of maintenance, or to discuss your specific packaging requirements, contact Path Pack’s technical team. Our machines feature German-engineered components from Siemens and Schneider Electric, CE certification, and comprehensive technical support to help you achieve optimal equipment performance.
By Path Pack Technical Team